Keychron Q1 / Q1 Pro / Q1 Max Acoustic Upgrade Kit

SKU: AUK-Q1
€10,00

Compatible Keyboard
Material

Compatible Keyboards: Q1 / Q1 Pro / Q1 Max

Please drop your email on "Notify Me When Available" if the product model is out of stock

Customer Reviews

Based on 1 review
100%
(1)
0%
(0)
0%
(0)
0%
(0)
0%
(0)
T
Tom Palny
This brought my Q1v2 to another level

I tested many different solutions. Currently with the Gateron G pro v2 Red and Durock V2 stabs I was left wanting more with the sound of the Q1.
The best by far sound I got out of this combo was using this acoustic upgrade.
Using (as shown in the instruction vid here) the two layers that are on the top of the PCB (i.e. the sound absorbing foam which replaces the original under the top plate, and the thin PE foam that is directly on top of the PCB and under the stabs, the bottom part setup that sounded best in my case:
1. Leave the shielding black plastic layer in the bottom frame, but remove the original thin foam layer.
2. Put the bottom frame acoustic foam layer that comes in this upgrade kit on top of the shielding plastic.
3. Add two layers (no need for more) of tape mod to the bottom of the PCB.
4. That's it! Thoccccy AF

Keychron Q1 & Q1 Pro Acoustic Upgrade Kit

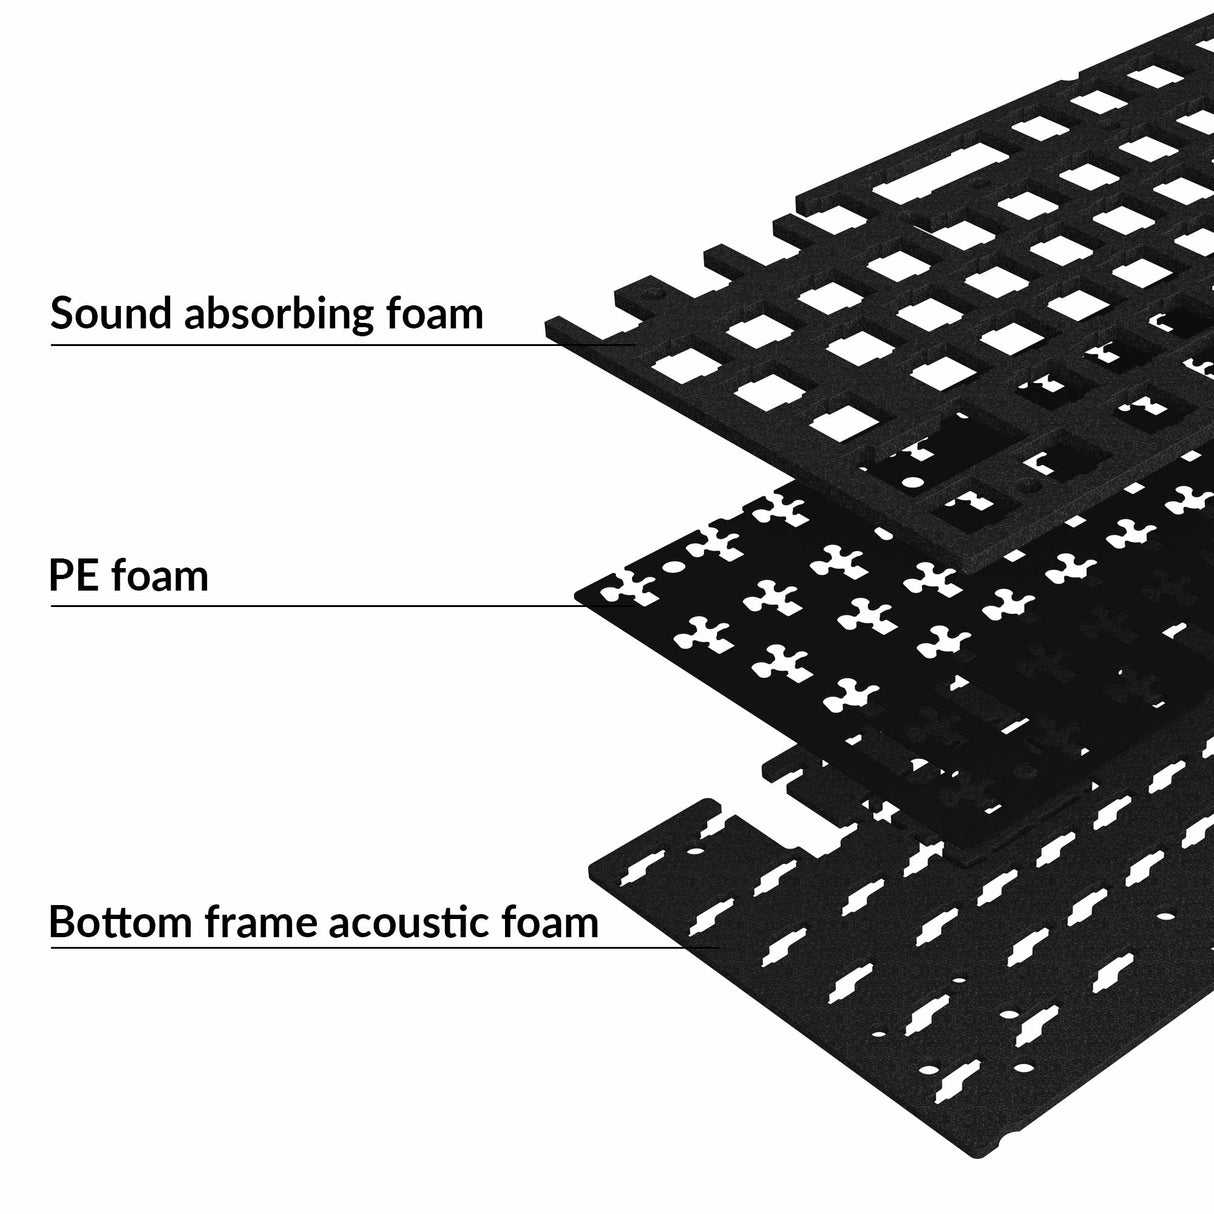
Want to optimize your Q1 or Q1 Pro keyboard typing experience? Try this upgrade kit! Made of Poron & XPE material, the kit includes sound-absorbing foam, PE foam, and bottom frame acoustic foam, all to further modify your keyboard for an improved and enhanced typing experience.

Keychron Q1 & Q1 Pro Acoustic Upgrade Kit

Foam modding the Q1 or Q1 Pro with this acoustic upgrade kit can further eliminate the hollowness of the keyboard and reduces the resonance on each keystroke.

Foam mod the Q1 or Q1 Pro with the acoustic upgrade kit

How to modify your Q1 or Q1 Pro with this kit?

The entire keyboard needs to be taken apart for kit installation. You can refer to the disassembling guide first (Q1 disassemble guide / Q1 Pro disassemble guide), and then watch the following clip for kit installation.

00:00: Apply the PE foam on the keyboard PCB.
00:29: Place the sound absorbing foam between the plate and the PCB.
00:50: Place the acoustic foam on the bottom case.

Specs

Package Contents MaterialThicknessSizeCompatible keyboard
1x Sound absorbing foamPoron3.5 mm310.08*126.74 mmKeychron Q1 / Q1 Pro ANSI layout
1x PE foamXPE0.3 mm310.38*126.77 mmKeychron Q1 / Q1 Pro ANSI layout
1x Bottom frame acoustic foamPoron2.5 mm311.38*126.77 mmKeychron Q1 / Q1 Pro ANSI layout
4x Gasket

*XPE foam is a new high-grade PE material with better mechanical and physical properties in stability, durability, and insulation effects.
Frequently bought together (Add-on)

Please select the matching variant for your product.

Customer Reviews

Based on 1 review
100%
(1)
0%
(0)
0%
(0)
0%
(0)
0%
(0)
T
Tom Palny
This brought my Q1v2 to another level

I tested many different solutions. Currently with the Gateron G pro v2 Red and Durock V2 stabs I was left wanting more with the sound of the Q1.
The best by far sound I got out of this combo was using this acoustic upgrade.
Using (as shown in the instruction vid here) the two layers that are on the top of the PCB (i.e. the sound absorbing foam which replaces the original under the top plate, and the thin PE foam that is directly on top of the PCB and under the stabs, the bottom part setup that sounded best in my case:
1. Leave the shielding black plastic layer in the bottom frame, but remove the original thin foam layer.
2. Put the bottom frame acoustic foam layer that comes in this upgrade kit on top of the shielding plastic.
3. Add two layers (no need for more) of tape mod to the bottom of the PCB.
4. That's it! Thoccccy AF